You’ve placed your Jesmonite AC100 Starter Kit order, waited at the window for the postman and now your parcel has arrived! So what next? Well, first things first, get excited because you’re about to embark on your Jesmonite journey and it’s going to be one you can’t get enough of.
Inside your kit you’ll find everything you need to get started. Jesmonite is a two-part system that contains a powder and a liquid. Mix these together at a ratio of 2.5:1 and you’ll get a nice thick liquid (a bit like double cream) that you’ll be able to pour into a mould. Leave to set for 20-30 minutes and voila! You have your first Jesmonite creation.
WHAT YOU NEED
- Jesmonite AC100 Starter Kit (AC100 Base & Powder, 3x pigment colours, 2x moulds, mixing sticks, gloves, instructions)
- 2x clean, dry disposable mixing cups or silicone mixing jugs
- Weighing scales
- Something to cover and protect your work surfaces
LET’S BREAK IT DOWN
- Make yourself a cup of tea, coffee or hot chocolate. Cover your work surfaces to stop them from getting damaged and take everything in your kit out so you can see what you have. Slip on the gloves that are in your kit to protect your hands.
- Choose which mould you’re going to start with. You’ll get two in your starter kit and you’ll find the quantities of powder and liquid needed to fill each one in the instructions included.
- Give your liquid a good shake. Before you start measuring, check that your mixing cups are squeaky clean and bone dry. If they’re not clean and dry, it could cause marks to appear on your creation. Weigh the correct amount of liquid out into one of your mixing cups using weighing scales. In the other mixing cup, weigh out your base powder. Don’t mix the two together at this stage.
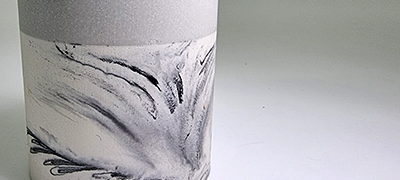
- We’re going to start by focusing on the liquid. If you want to make your creation a block colour, now is the time to add pigment to your liquid. We always add pigment to the liquid for a block colour before adding the powder. You can add up to 2% of the overall weight (the powder and liquid added together) to your liquid depending on the colour you want to achieve. The less pigment you add, the paler the colour will be. If you add the full 2% you’ll get a bright and vivid colour. Remember, Jesmonite pigments are strong! One tiny drop of pigment will drastically change the colour so make sure you bear this in mind. Once you’ve added your pigment, give the liquid a thorough stir.
- Now it’s time to add your pre-weighed powder to your liquid and start mixing. Always tip your powder into the liquid, never the other way around. Your mixture might look a little unpromising at first but keep mixing with your mixing sticks and eventually the powder will combine with the liquid to create a smooth consistency.
- To eliminate any air bubbles, give your mixing cup a tap on your work surface before you begin to pour it into your mould.
- In a moment, you’re going to pour your mixture into the mould a little at a time. In between pouring, we’re going to use what we call the ‘tapping and slapping’ method which will help to bring any air bubbles to the surface. To do this, you’re going to pour a little mixture into the mould then gently ‘tap’ the sides of your mould with your fingers. Then you’re going to lift the mould and gently ‘slap’ it down on your work surface from a height of around 3cm. Keep repeating this, adding a little more mixture each time. As you begin to fill your mould to just under the top, you might find that you can only ‘tap’ and not ‘slap’. That’s totally fine, and if you’re a little unsure, there’s a video below that shows you this method on-screen.
- The next half an hour is when the magic happens. As your mixture starts to become a solid, a chemical reaction will occur. After around 15 minutes, you can lightly touch your piece and you’ll feel it’s very warm to the touch. This just means it’s working! After 20-30 minutes, check your piece. It should feel as though it’s cooled down and this is an indication that it’s ready to be taken out of the mould.
- Carefully and gently remove your creation from the mould in one fluid motion. If you stop and start, you could cause marks on your piece. Jesmonite takes around 24 hours to fully set but don’t leave your piece in the mould for that long. Leaving your piece in the mould for too long could cause sweating within the mould, meaning your creation will be left with marks. Set your piece on top of the mould to cool. As with baking, this will allow air to get to every part of your creation, not just the top.
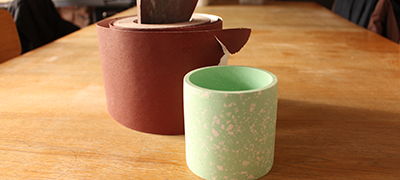
And there you have it! Your very first Jesmonite piece. Now you’ve got the hang of it, it’s time to focus on sanding and finishing! Check our other guides and blog posts for tips and techniques on the next part of your Jesmonite journey.
Have any questions about your starter kit or just need a little advice? We’re here to help, just drop us a message on WhatsApp (bottom right) and we’ll be happy to chat through anything you need.