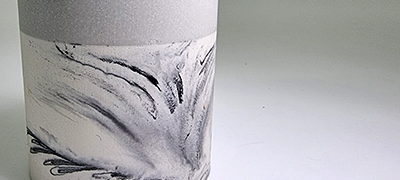
If your arm is aching from sanding your terrazzo pieces, why not try doing some marbling? Marbled creations require much less sanding and you can create some beautiful patterns using any colours you dream of! How your marbled pattern turns out depends on the technique you use. We’ve detailed three of our favourite techniques below, with each one giving a completely unique look, meaning you’ll achieve a totally bespoke creation each and every time.
WHAT YOU NEED
- 2x clean, dry cups or mixing jugs
- Weighing scales
- 2x mixing sticks
- Jesmonite AC100 Base & Liquid
- Jesmonite pigments
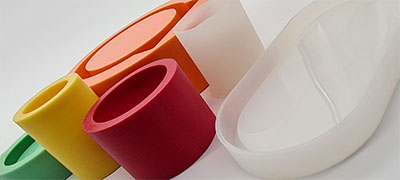
- 1x silicone mould
TECHNIQUE #1: STIR IT IN
- Decide on two colours that you want to marble with before you start weighing your Jesmonite. This technique works best if you use a lighter dominant colour such as white or any paler shade then create your marble effect with a darker shade.
- In one cup, weigh out the amount of Jesmonite liquid that you need to fill your mould as you usually would (if you need help with this, have a look at our Mould Ratio and Volume Guide). At this point you need to add your chosen pigments to your liquid to create your dominant colour. For this you need to add a little less than 2% of the overall weight (liquid and powder added together), as you’ll be adding more pigment when you marble with your second colour. Whilst you’re still trialling marbling methods, you could just try starting with the natural white shade of the Jesmonite and not add any pigment at this stage. It’s totally up to you.
- Add the correct amount of base powder to your liquid and mix thoroughly to eliminate any lumps.
- This is where the fun starts! Your second colour will be your slightly darker colour. Add a couple of drops of pigment into your pre-mixed Jesmonite then, using your mixing stick, gently swirl the pigment around, dragging it through the mixture to create marble patterns. You can add more pigment drops if the colour isn’t quite strong enough, but just be careful not to over-swirl as this will just mix the colour into your Jesmonite instead of creating a marble pattern.
- Once you’re happy, pour your Jesmonite into your mould, using a zigzag motion across the mould. Make sure you tap the sides of your mould as you go to bring any air bubbles to the surface.
- After 20-30 minutes you can carefully remove your piece from your mould and see the pattern you’ve created!
TECHNIQUE #2: DOUBLE CUP POUR
- As with technique number one, decide on the two colours you’d like to use. With this technique, you can use any colours you like.
- This is where we need to do a little maths. You need to halve the amount of liquid and powder that you need to fill your mould. So, for example, if you need 100 grams of liquid and 250 grams of powder, you’ll half this to 50 grams of liquid and 125 grams of powder.
- In one cup, weigh out your halved amount of Jesmonite liquid, using your weighing scales. Do exactly the same thing in your second cup so you have two cups of Jesmonite liquid.
- You can then add your chosen pigments to each cup of liquid. Remember not to add more than 2% of the overall weight for each cup. Mix your pigments into your liquid.
- Weigh out your halved amount of base, add this to one cup of liquid and mix it thoroughly. Repeat this for the second cup so you have two cups of Jesmonite mixture that are different colours.
- Hold one cup in each hand next so they’re right next to each other over your mould. Tip the cups towards each other until the Jesmonite starts to pour. Your two colours should be intertwining with each other, creating a bolder, less delicate marble effect than in technique number one. Use the same zigzag pouring motion that we used in technique number one across the mould to create a random and interesting marble pattern, tapping your mould as you pour.
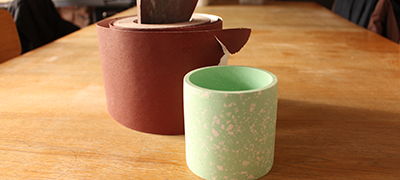
- After 20-30 minutes you can gently demould your piece!
TECHNIQUE #3: SINGLE CUP POUR
- Repeat all the steps in technique number two, right up until the end of step number five.
- You should now have two cups of different coloured Jesmonite mixture. At this stage, you need to pour one colour into the other, so both colours are now in the same cup. Don’t mix it in!
- Pour the full amount of mixture into your mould using a zigzag motion. You’ll see both colours start to pour out of the cup and come together to create your marble pattern. Don’t forget to tap your mould as you go to get rid of any air bubbles!
- After 20-30 minutes, gently remove your piece from the mould to reveal your unique pattern.
There are so many techniques you can use when marbling, but these three give you a place to start. Try experimenting with different ways of mixing and pouring and tag us in your creations on Instagram! We’d love to see your marble patterns!